How do i run a flutterflow app on ios
Asked on 2024-07-30
1 search

To run a FlutterFlow app on iOS, you will need to follow a series of steps that involve setting up your development environment, building your app, and then distributing it for testing or release. While the context provided does not specifically cover FlutterFlow, it does provide useful information on using Xcode and TestFlight, which are essential for iOS app development and distribution.
Here are the general steps you would follow:
-
Set Up Your Development Environment:
- Install Xcode from the Mac App Store.
- Install Flutter and Dart SDKs by following the official Flutter installation guide.
-
Build Your FlutterFlow App:
- Export your FlutterFlow project to Flutter code.
- Open the project in Xcode by navigating to the
iosdirectory of your Flutter project and opening the.xcworkspacefile.
-
Configure Your App for iOS:
- Set up your app's bundle identifier in Xcode.
- Ensure all necessary iOS permissions are configured in the
Info.plistfile.
-
Run Your App on a Simulator or Device:
- Connect an iOS device or use an iOS simulator.
- In Xcode, select your device or simulator and click the run button to build and run your app.
-
Distribute Your App Using TestFlight:
- Archive your app in Xcode by going to the Product menu and selecting Archive.
- Once the archive is created, use the Xcode Organizer to distribute your app to TestFlight for beta testing.
For more detailed steps on distributing your app using TestFlight, you can refer to the Xcode essentials session from WWDC 2024, which covers how to use TestFlight to distribute your app to beta testers.
Relevant Sessions:
These sessions provide insights into using Xcode and TestFlight for app distribution, which are crucial for running and testing your FlutterFlow app on iOS.
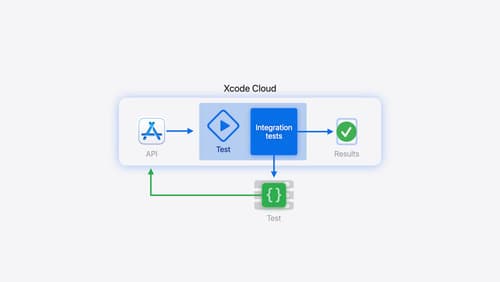
Extend your Xcode Cloud workflows
Discover how Xcode Cloud can adapt to your development needs. We’ll show you how to streamline your workflows, automate testing and distribution with start conditions, custom aliases, custom scripts, webhooks, and the App Store Connect API.
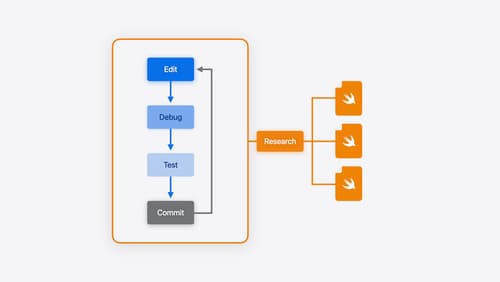
Xcode essentials
Edit, debug, commit, repeat. Explore the suite of tools in Xcode that help you iterate quickly when developing apps. Discover tips and tricks to help optimize and boost your development workflow.
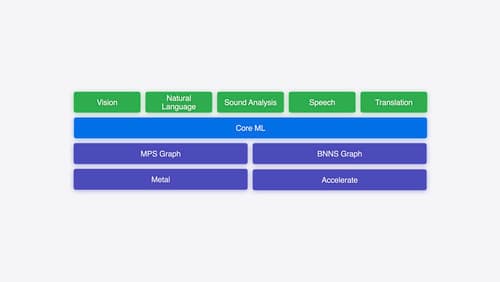
Explore machine learning on Apple platforms
Get started with an overview of machine learning frameworks on Apple platforms. Whether you’re implementing your first ML model, or an ML expert, we’ll offer guidance to help you select the right framework for your app’s needs.