how do I create a menu bar app
Asked on 2024-08-01
1 search

To create a menu bar app on macOS, you can use SwiftUI and AppKit together. Here are the steps to get you started:
-
Create a SwiftUI App: Start by creating a new SwiftUI project in Xcode.
-
Define the Menu: Use SwiftUI to define your menu. You can use
NSHostingMenuto integrate SwiftUI menus into your AppKit context. This allows you to share menu definitions between different parts of your app.import SwiftUI struct MyMenu: View { var body: some View { Menu("My Menu") { Button("Action 1", action: performAction1) Button("Action 2", action: performAction2) } } func performAction1() { // Action 1 code } func performAction2() { // Action 2 code } } -
Integrate with AppKit: Use
NSHostingMenuto integrate the SwiftUI menu into your AppKit application.import AppKit import SwiftUI class AppDelegate: NSObject, NSApplicationDelegate { var statusBarItem: NSStatusItem? func applicationDidFinishLaunching(_ notification: Notification) { let menu = NSMenu() let hostingMenu = NSHostingMenu(rootView: MyMenu()) menu.addItem(withTitle: "My Menu", action: nil, keyEquivalent: "").submenu = hostingMenu statusBarItem = NSStatusBar.system.statusItem(withLength: NSStatusItem.variableLength) statusBarItem?.button?.title = "Menu Bar App" statusBarItem?.menu = menu } } -
Set Up the App Delegate: Ensure your
AppDelegateis set up correctly in your@mainstruct.@main struct MyApp: App { @NSApplicationDelegateAdaptor(AppDelegate.self) var appDelegate var body: some Scene { WindowGroup { ContentView() } } }
For more detailed information on integrating SwiftUI with AppKit, you can refer to the session What’s new in AppKit.
Relevant Sessions
These sessions provide insights into using SwiftUI with AppKit, customizing window behaviors, and refining window placements, which are essential for creating a polished menu bar app.
Design great visionOS apps
Find out how to create compelling spatial computing apps by embracing immersion, designing for eyes and hands, and taking advantage of depth, scale, and space. We’ll share several examples of great visionOS apps and explore how their designers approached creating new experiences for the platform.
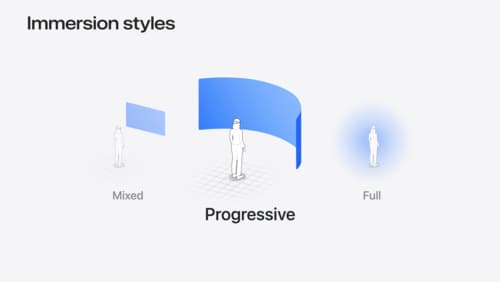
Dive deep into volumes and immersive spaces
Discover powerful new ways to customize volumes and immersive spaces in visionOS. Learn to fine-tune how volumes resize and respond to people moving around them. Make volumes and immersive spaces interact through the power of coordinate conversions. Find out how to make your app react when people adjust immersion with the Digital Crown, and use a surrounding effect to dynamically customize the passthrough tint in your immersive space experience.

What’s new in AppKit
Discover the latest advances in Mac app development. Get an overview of the new features in macOS Sequoia, and how to adopt them in your app. Explore new ways to integrate your existing code with SwiftUI. Learn about the improvements made to numerous AppKit controls, like toolbars, menus, text input, and more.