Layout an event ticket in wallet?
Asked on 2024-07-30
1 search

To layout an event ticket in Wallet, you can follow the guidelines and updates presented in the session What’s new in Wallet and Apple Pay. Here are the key steps and considerations:
-
Pass JSON Structure:
- Header and Primary Fields: Include these fields to render the legacy ticket type for previous OS versions.
- Semantically Tagged Data: Add semantically tagged information to render the new ticket style.
- Event Start Date and Time: Use this for the labels at the top of the pass.
- Seats Dictionary: Populate this to display seating and entry information in the footer.
-
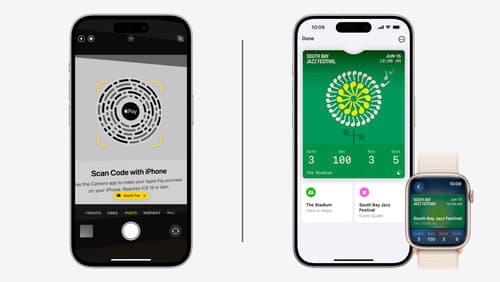
Visual Elements:
- Event Logo and Date/Time: Display these at the top of the pass.
- Event Artwork: Use strategically placed labels to give more focus and space to the event artwork.
- Footer: Display primary seating information and a secondary logo.
-
New Features:
- Live Activity: The pass can start a live activity on iPhone and Apple Watch, displaying primary seating and entry information on the lock screen or smart stack.
- Event Guide: Provides ticket holders with a space to view more detailed information about the event.
- Maps Integration: Include venue location coordinates to drive maps redirection and weather experiences.
-
Best Practices:
- Semantic Tags: Use semantic tags wherever possible to help surface pass information in the event guide and on the pass itself.
- Compatibility: Ensure the pass includes primary, secondary, and auxiliary fields to maintain compatibility with older OS versions.
- Preferred Style: Specify the preferred style in the pass JSON to render the new event style.
For a detailed walkthrough, you can refer to the session What’s new in Wallet and Apple Pay.