how to create custom cifilter using metal
Asked on 2024-08-06
1 search

To create a custom CIFilter using Metal, you can follow these general steps:
-
Set Up Your Metal Environment: Ensure you have a Metal environment set up in your project. This includes creating a Metal device, command queue, and other necessary components.
-
Create a Custom Metal Shader: Write your custom shader in the Metal Shading Language (MSL). This shader will define how each pixel is processed.
-
Integrate with Core Image: Use the
CIKernelclass to create a custom kernel from your Metal shader. You can then create aCIFiltersubclass that uses this kernel. -
Apply the Filter: Use your custom CIFilter in your image processing pipeline.
For a practical example of how to use Metal shaders within SwiftUI, you can refer to the session Create custom visual effects with SwiftUI (20:10). This session demonstrates how to instantiate a shader in SwiftUI, pass parameters, and apply the effect to a view.
For more detailed information on displaying images using Core Image and Metal, you can refer to the session Use HDR for dynamic image experiences in your app (26:48). This session covers setting up an MTK view for extended range content, applying filters, and rendering the resulting image.
Relevant Sessions:
If you need more specific details or code examples, please let me know!
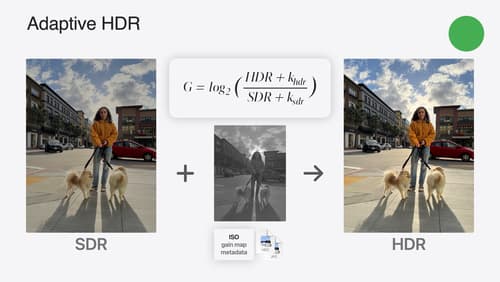
Use HDR for dynamic image experiences in your app
Discover how to read and write HDR images and process HDR content in your app. Explore the new supported HDR image formats and advanced methods for displaying HDR images. Find out how HDR content can coexist with your user interface — and what to watch out for when adding HDR image support to your app.
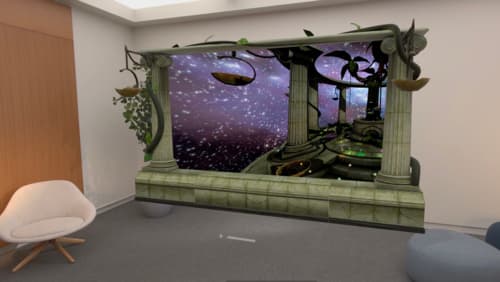
Bring your iOS or iPadOS game to visionOS
Discover how to transform your iOS or iPadOS game into a uniquely visionOS experience. Increase the immersion (and fun factor!) with a 3D frame or an immersive background. And invite players further into your world by adding depth to the window with stereoscopy or head tracking.

Create custom visual effects with SwiftUI
Discover how to create stunning visual effects in SwiftUI. Learn to build unique scroll effects, rich color treatments, and custom transitions. We’ll also explore advanced graphic effects using Metal shaders and custom text rendering.