create simple swiftUI app with pencilkit
Asked on 2025-01-05
1 search

To create a simple SwiftUI app with PencilKit, you can leverage the advancements and features introduced in the session titled "Squeeze the most out of Apple Pencil" from WWDC 2024. PencilKit provides an easy way to integrate a rich drawing experience into your app, and with the new Apple Pencil Pro, you can enhance this experience further.
Here's a basic outline to get you started:
-
Set Up PencilKit: Use the
PKCanvasViewto create a drawing canvas. This view will handle the drawing interactions with the Apple Pencil. -
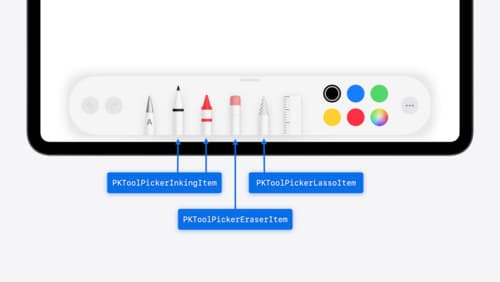
Tool Picker Integration: Utilize the
PKToolPickerto provide users with a variety of drawing tools. You can configure the tool picker to include custom tools specific to your app's needs. -
Custom Tools: You can build custom tools into the tool picker. For example, you might want to add a custom stamp tool or a shape picker.
-
Apple Pencil Pro Features: Take advantage of the new features like the squeeze gesture to quickly switch tools or show the tool picker. You can also use the barrel roll angle to control the angle of strokes, providing a more expressive drawing experience.
-
SwiftUI Integration: There are new SwiftUI APIs available to integrate PencilKit into your SwiftUI app seamlessly.
For a detailed demonstration and code examples, you can refer to the session Squeeze the most out of Apple Pencil (08:47) which covers Apple Pencil Pro features and APIs.
By following these steps and utilizing the resources from the session, you can create a simple yet powerful drawing app using SwiftUI and PencilKit.
Squeeze the most out of Apple Pencil
New in iOS 18, iPadOS 18, and visionOS 2, the PencilKit tool picker gains the ability to have completely custom tools, with custom attributes. Learn how to express your custom drawing experience in the tool picker using the same great tool picking experience available across the system. Discover how to access the new features of the Apple Pencil Pro, including roll angle, the squeeze gesture, and haptic feedback.
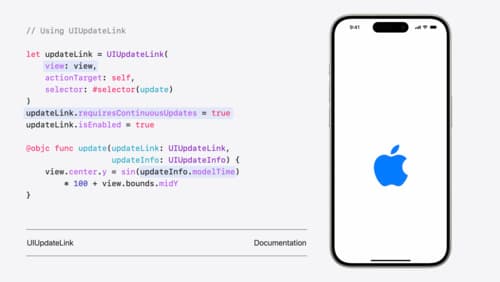
What’s new in UIKit
Explore everything new in UIKit, including tab and document launch experiences, transitions, and text and input changes. We’ll also discuss better-than-ever interoperability between UIKit and SwiftUI animations and gestures, as well as general improvements throughout UIKit.
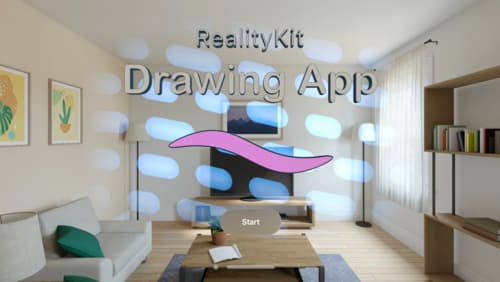
Build a spatial drawing app with RealityKit
Harness the power of RealityKit through the process of building a spatial drawing app. As you create an eye-catching spatial experience that integrates RealityKit with ARKit and SwiftUI, you’ll explore how resources work in RealityKit and how to use features like low-level mesh and texture APIs to achieve fast updates of the users’ brush strokes.