How to add sceneDelegate to the current Xcode Project?
Asked on 2025-03-31
2 searches

To add a sceneDelegate to your current Xcode project, you can follow these general steps:
-
Open your Xcode project: Start by opening your existing project in Xcode.
-
Add a new file: Go to the File menu, select "New" and then "File..." to create a new file.
-
Choose the template: In the template chooser, select "iOS" and then "Source". Choose "Cocoa Touch Class" and click "Next".
-
Configure the new class: Name your class something like
SceneDelegateand make sure it's a subclass ofUIResponderand conforms to theUIWindowSceneDelegateprotocol. Click "Next" and then "Create" to add the file to your project. -
Implement the SceneDelegate methods: In your new
SceneDelegateclass, implement the necessary methods to manage your app's scenes. This typically includes methods likescene(_:willConnectTo:options:),sceneDidDisconnect(_:),sceneDidBecomeActive(_:), etc. -
Update your Info.plist: Ensure that your
Info.plistfile is configured to use theSceneDelegate. This usually involves setting theUIApplicationSceneManifestkey with appropriate sub-keys to specify yourSceneDelegateclass. -
Modify your AppDelegate: If your project was initially set up without a
SceneDelegate, you might need to adjust yourAppDelegateto work with scenes. This often involves removing or modifying methods related to the app lifecycle that are now handled by theSceneDelegate.
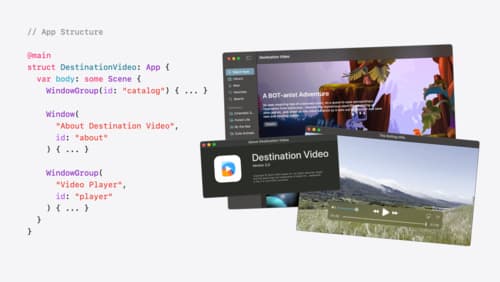
For more detailed guidance, you might want to refer to the session on Xcode essentials which covers tricks for creating new files and managing your project structure effectively.
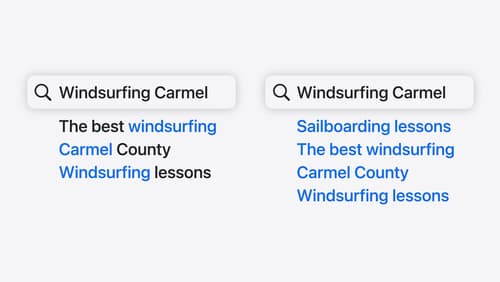
Support semantic search with Core Spotlight
Learn how to provide semantic search results in your app using Core Spotlight. Understand how to make your app’s content available in the user’s private, on-device index so people can search for items using natural language. We’ll also share how to optimize your app’s performance by scheduling indexing activities. To get the most out of this session, we recommend first checking out Core Spotlight documentation on the Apple Developer website.
Tailor macOS windows with SwiftUI
Make your windows feel tailor-made for macOS. Fine-tune your app’s windows for focused purposes, ease of use, and to express functionality. Use SwiftUI to style window toolbars and backgrounds. Arrange your windows with precision, and make smart decisions about restoration and minimization.

Get started with HealthKit in visionOS
Discover how to use HealthKit to create experiences that take full advantage of the spatial canvas. Learn the capabilities of HealthKit on the platform, find out how to bring an existing iPadOS app to visionOS, and explore the special considerations governing HealthKit during a Guest User session. You’ll also learn ways to use SwiftUI, Swift Charts, and Swift concurrency to craft innovative experiences with HealthKit.