How do I change the mouse cursor in SwiftUI?
Asked on 2024-07-30
1 search

To change the mouse cursor in SwiftUI, you can use the new custom hover effect API introduced in the latest updates. This API allows you to modify how views respond to hover interactions, including changing the appearance of the cursor.
Here are the steps to achieve this:
-
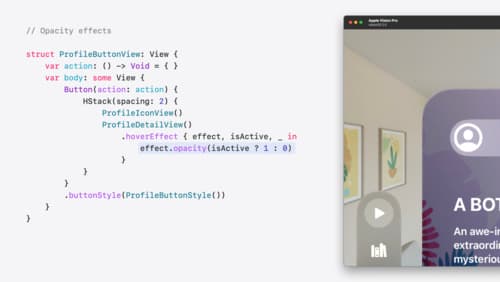
Use the Hover Effect Modifier: Apply the
hoverEffectmodifier to your SwiftUI views. This modifier allows you to define custom effects that change the view's appearance when hovered over. -
Customize the Hover Effect: Within the
hoverEffectmodifier, you can control the view's appearance as it transitions between active and inactive states. This includes changing the cursor style.
For more detailed information, you can refer to the session Create custom hover effects in visionOS from WWDC 2024, which covers how to make SwiftUI views respond to hover interactions using the new custom hover effect API.
Relevant Sessions
These sessions provide comprehensive insights into the new hover effect capabilities and how to implement them in your SwiftUI applications.
Create custom hover effects in visionOS
Learn how to develop custom hover effects that update views when people look at them. Find out how to build an expanding button effect that combines opacity, scale, and clip effects. Discover best practices for creating effects that are comfortable and respect people’s accessibility needs.

SwiftUI essentials
Join us on a tour of SwiftUI, Apple’s declarative user interface framework. Learn essential concepts for building apps in SwiftUI, like views, state variables, and layout. Discover the breadth of APIs for building fully featured experiences and crafting unique custom components. Whether you’re brand new to SwiftUI or an experienced developer, you’ll learn how to take advantage of what SwiftUI has to offer when building great apps.

Discover RealityKit APIs for iOS, macOS and visionOS
Learn how new cross-platform APIs in RealityKit can help you build immersive apps for iOS, macOS, and visionOS. Check out the new hover effects, lights and shadows, and portal crossing features, and view them in action through real examples.