How to use new glass effect
Asked on 2025-06-12
1 search
To use the new glass effect in your app, you can follow these steps based on the sessions from WWDC 2025:
-
Creating Glass Effects:
- In UIKit, create a UI Visual Effect view and set the effect to a new UI glass effect within an animation block. By default, the glass appears in a capsule shape, but you can customize it using the new corner configuration API. The glass adapts to light and dark modes automatically based on the user interface style (Build a UIKit app with the new design).
-
Using Liquid Glass:
- Liquid Glass is designed to be an interactive layer that floats above your content. It is best used for important elements like custom buttons that need to stand out. To use it, create a UI Visual Effect view and configure it with the glass effect (Build a UIKit app with the new design).
-
Grouping Glass Elements:
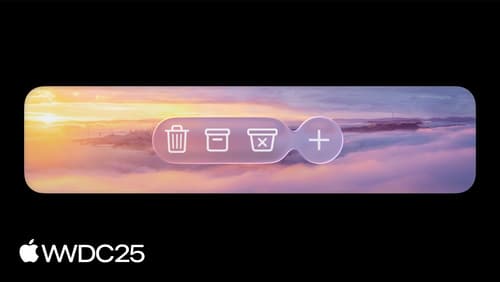
- When you have multiple glass elements, use a glass effect container to group them. This allows them to share their sampling region, providing a consistent visual result. The glass material reflects and refracts light, picking colors from nearby content (Build an AppKit app with the new design).
-
Animating Glass Effects:
- You can animate changes to the glass effect, such as its tint color or content. For example, when you no longer need the glass on screen, animate it out by setting the effect to nil (Build a UIKit app with the new design).
-
SwiftUI Integration:
- In SwiftUI, use the Glass Effect ID modifier to add transitions to your glass container. This allows for fluid morphing of elements like badges when they expand or contract (Build a SwiftUI app with the new design).
These steps provide a comprehensive guide to implementing the new glass effect in your app, enhancing its visual appeal and interactivity.

Build a UIKit app with the new design
Update your UIKit app to take full advantage of the new design system. We’ll dive into key changes to tab views, split views, bars, presentations, search, and controls, and show you how to use Liquid Glass in your custom UI. To get the most out of this video, we recommend first watching “Get to know the new design system” for general design guidance.

Build a SwiftUI app with the new design
Explore the ways Liquid Glass transforms the look and feel of your app. Discover how this stunning new material enhances toolbars, controls, and app structures across platforms, providing delightful interactions and seamlessly integrating your app with the system. Learn how to adopt new APIs that can help you make the most of Liquid Glass.

Build an AppKit app with the new design
Update your AppKit app to take full advantage of the new design system. We’ll dive into key changes to tab views, split views, bars, presentations, search, and controls, and show you how to use Liquid Glass in your custom UI. To get the most out of this video, we recommend first watching “Get to know the new design system” for general design guidance.
